Remember the 5x5x5 LED Matrix I built roughly two years ago? Well, I have exciting news: I am pleased to present the return of the LED Matrix, but as a virtual simulation with amazing extra features and capabilities! Namely, the ability to easily create light animations through saving frames with a user-friendly GUI and viewing it from various angles!
The Inspiration + How It Works
When my grade 12 Computer Science teacher introduced our final summative project for the course, I knew I had to do something meaningful and worth remembering. I spent at least an hour just sitting and thinking of ideas, brainstorming potential projects, and calling up my friend to critique them until I landed on an idea that was just right.
Scrapping ideas like a mandala maker and a friends-to-enemy simulation where you can adjust factors like loyalty levels and betrayal rate, my eyes had caught an old experimental program, where I was testing how to make dynamic objects that could not just translate but also rotate and scale based on user interactions. Unfortunately, I had never implemented my theses tests anywhere because it was too messy and incomplete (although I originally wanted to try implementing them as special effects in my Box Capture Game), I knew this summative opened up a chance to implement (and better learn) this concept of more dynamic visuals, especially 3D visuals, which I had only gazed at from some random tutorials afar.
While I don’t quite remember how I ended up deciding to base a project on my LED matrix (my theory is that the tutorials showed a CUBE in 3D and my mind connected that to the 3D LED Matrix, which is a CUBE), I fell in love with the idea right away. Especially because it provided a solution to a frustration I faced when working on the 5x5x5 LED Matrix: visualizing the animations.
“At one point, I had trouble visualising the patterns I wanted to display, so I went on an frame-by-frame animation game to draw out how each row or column of LEDs would light up to create my display patterns!”
– 5x5x5 LED Matrix Blog Post
What I didn’t mention in greater depth were numerous flaws with using a frame-by-frame animation.
- It was not 3-Dimensional. I could only visualize two dimensions at a time, requiring me to imagine how certain aspects would look like in a 3D view. If I made a mistake in my mind, then I wouldn’t find out until after I had spent the time coding the animation!
- It was not very user-interface friendly for my purposes- which makes sense considering it was a kids game, and I was just trying to make due. But the slow mouse drag and drop made it feel as I was trying to draw Starry Night by Van Gogh on paint.net
- It. Did. Not. Save. This meant every time my browser timed out, the page would automatically reload and all my progress would be deleted. I would have to re-draw a 5×5 grid (yes, using the mouse drag and drop) and all my frames. This was inconvenient as I felt the need to rush and finish all my work in one night…
In hindsight, it wasn’t that bad, but like any good engineer, I constantly strive to make things as convenient and accessible as possible!
The Design + Making The GUI
Before I jumped straight into coding, I spent some time ensuring I knew exactly what I was coding. After all, there was so much of the design aspect I had to consider when it came to my project, namely the features that would fix the problems above…
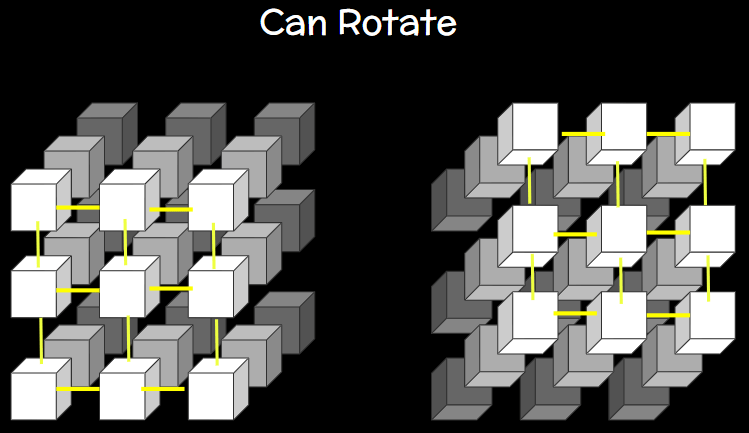
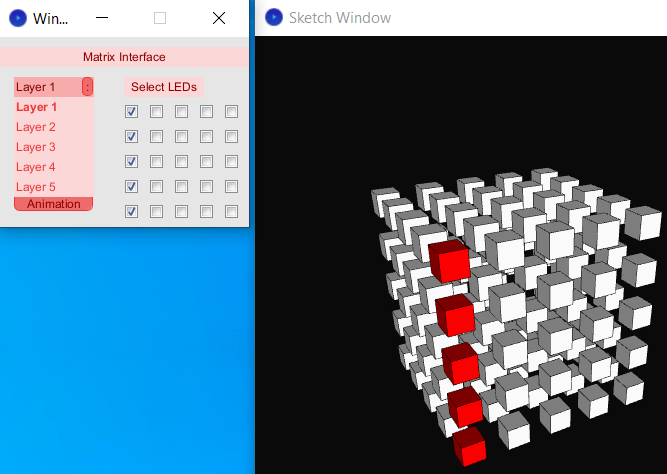
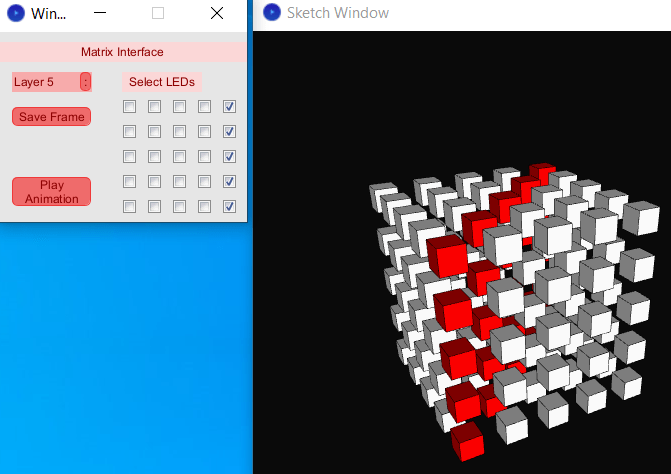
My main concept was that I wanted to create a virtual LED matrix simulation that wouldn’t require any coding from users, and the ability to easily visualize animations. I envisioned that the user could select LEDs, and once they reached a desired arrangement of saved LED’s, they could save it as a frame. At any point, they could click the “Play Animation” button, and the program will automatically flip through all the frames, as a beautiful light show animation. Most cool of all though, is that users would be able to interact with the cube by being able to rotate and view it from various angles!
Here is what I planned what the GUI to look like:
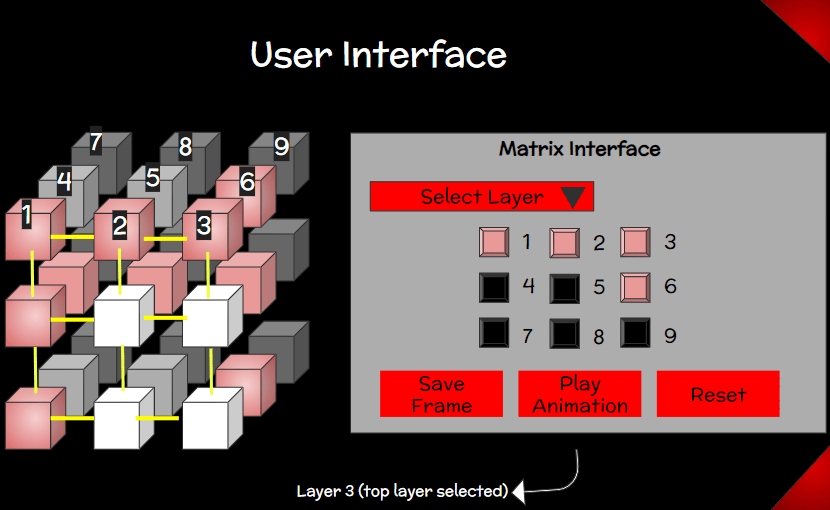
These diagrams were created on google drawings which I inserted on a google slideshow for my project pitch, where I presented my idea to my teacher. For the sake of time, I only made a 3x3x3 cube, with the intention that the code would be 5x5x5 cube that worked the same way- until I realised that I could make it even more dynamic and let the users choose the size of the cube! (of course, I considered this an extra if-time-allows-before-deadline feature)
Here is a picture of a former user interface idea that I realised wouldn’t work:
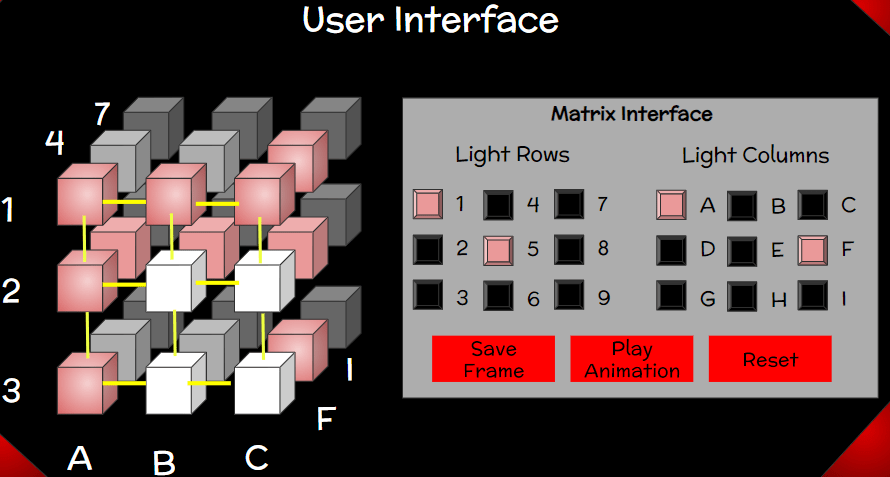
only entire rows and columns.
The Final Product!
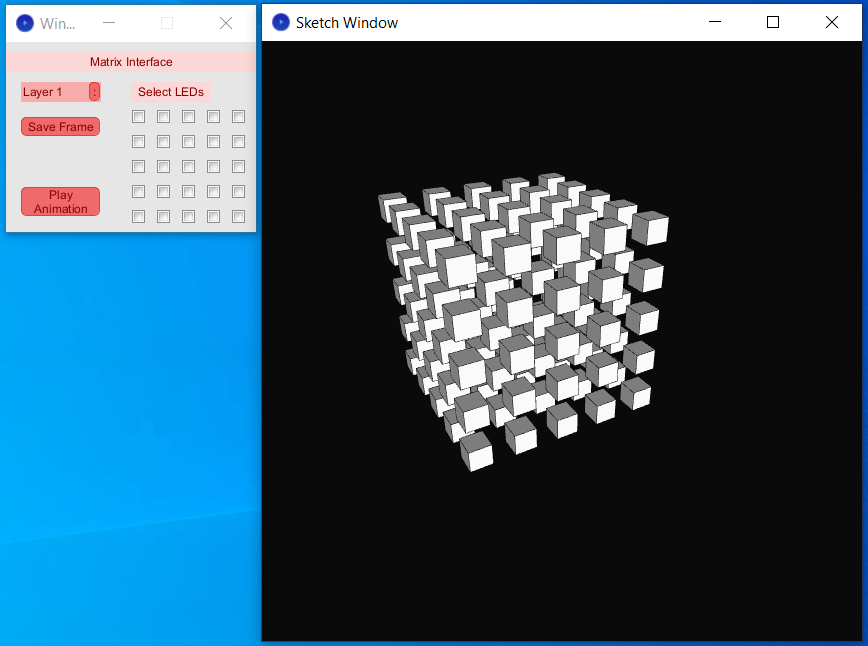
After roughly two weeks, I managed to finish! Not that I had much of a choice, with exams and the summative deadline looming over me. However, I am very proud of the working project. While the GUI took some getting used to (had redo it at least twice 😭), it worked wonderfully! As the for the rotation and viewing of different angles, it was one of the first things I managed to figure out. Through watching tutorials and tinkering with pre-existing examples on the Processing Reference, I learned the fascinating process (pun intended) of how transformations incorporate matrices- just like the name of my project! Basically, rather than the usual translations I was used to, where I would change the coordinates of the object, I would do other transformations by changing the screen itself! For example, to translate 10 units, I would shift the screen itself 10 units over, while the object would be created at the same coordinates. It’s like the difference between moving a plate on a dining table, and moving the dinning table itself. In both cases, the plate is technically in a different spot! Where does the matrices come in? Well, the different ways you saved the screen transformations would be done on a “pushed” matrix, which would be “popped” once you were done.
Enough jargon though! Here’s how it looks:
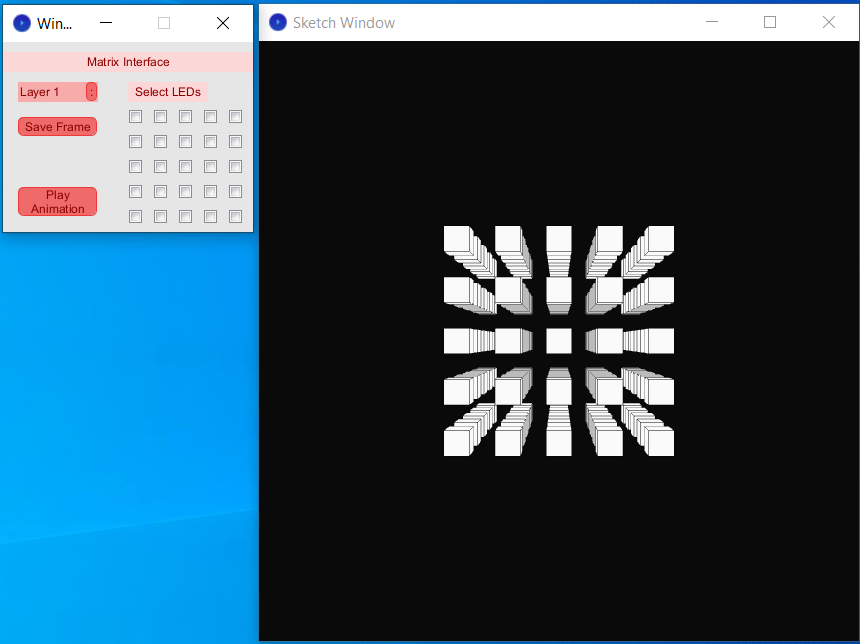
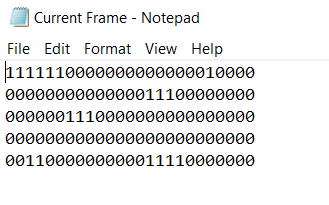
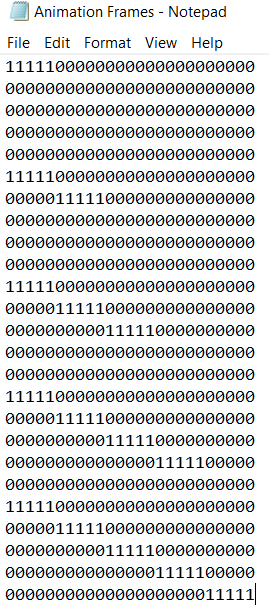
Context For Slides 5 & 6: these are screenshots of the data files in the program, with the current frame file continuously updating to match the user LED selections, and the animation frame file uploading the current frames onto the animation file whenever the user decides to save it as a frame. The program then uses these files to recreate frames!
And let’s not forget a video:
A Meaningful Reflection…And Potential Return?!
Like most of my projects, I’m proud of what the project, especially what I’ve learned along the way! However, in this particular project, there were so many additional features I had thought of along the ways, once I hadn’t been able to implement due to exam season and other summatives combined with the time constraints of the project itself. Of course, considering I had achieved my initial goals when I first started this project, I knew what I had perfectly qualified as a finished project.
Does it still bother me slightly that there’s a few features I didn’t get to? Obviously.
Does finishing the project as an assignment mean I’m finished with it? Obviously not.
What does this mean?
…It means that stay tuned for an update! Whether it’s in a couple days or a few weeks, I just know I’ll be back with some exciting modifications.
See you soon 🙂
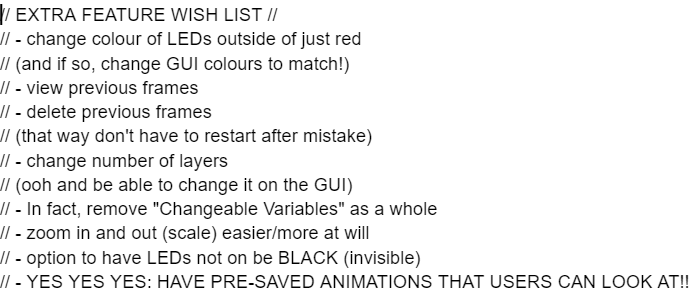
P.S. here’s a list of some of the extra feature ideas I had:

Leave a comment