Hey, welcome to the Braillinator, my most recent project and my FIRST project since starting university! So much has changed since the Firefighter Project (and the Moving Mario Bridge) that building those feels like ages ago rather than just a few months. Overall though, I’m so glad to have gotten a project out during this busy adjustment period for me, so let’s get right into it!
What Is It?
The Braillinator is a text from image to Braille converter that scans text using a phone camera and translates to braille. The translation is done by pistons that automatically push out of a corresponding physical device, where the user can place their fingers on. These pistons push in and out, spelling out the text in braille, letter by letter, giving the same tactile experience as braille. This physical device also plays through speed adjustments and other controls.
But before I do the grand reveal of the Braillinator in action, let’s first take a stroll of what happened behind the scenes to get this baby running!
The Context… (aka how it all started)
The project all started thanks to one of my courses during my first semester at university: the SE101 Course, which allowed me the opportunity to build a final project with fellow classmates over the course of the second-half of our semester.
The idea, on the hand had actually been born exactly one year prior. I was at a Tedx Youth event (organized by my very talented classmates!) when one of the speakers inspired me. And for the life of me, I can’t recall what exactly she had said, or even what her topic was about, but I remember my mind whirling as I sat in the dark Lazaridis Hall, watching the speaker in the spotlight. I had quickly written down my thoughts on my trusty notes app, knowing it would eventually find it’s time to shine…
(after some sleuthing, I did manage to finally find the Tedx Talk: https://www.youtube.com/watch?v=QGuIrEmih6w)
The Brainstorming & Planning
So, over the course of a few meetings, we bounced around many ideas, finding the concept of the braille project interesting while still considering others, before deciding that it really was the one…

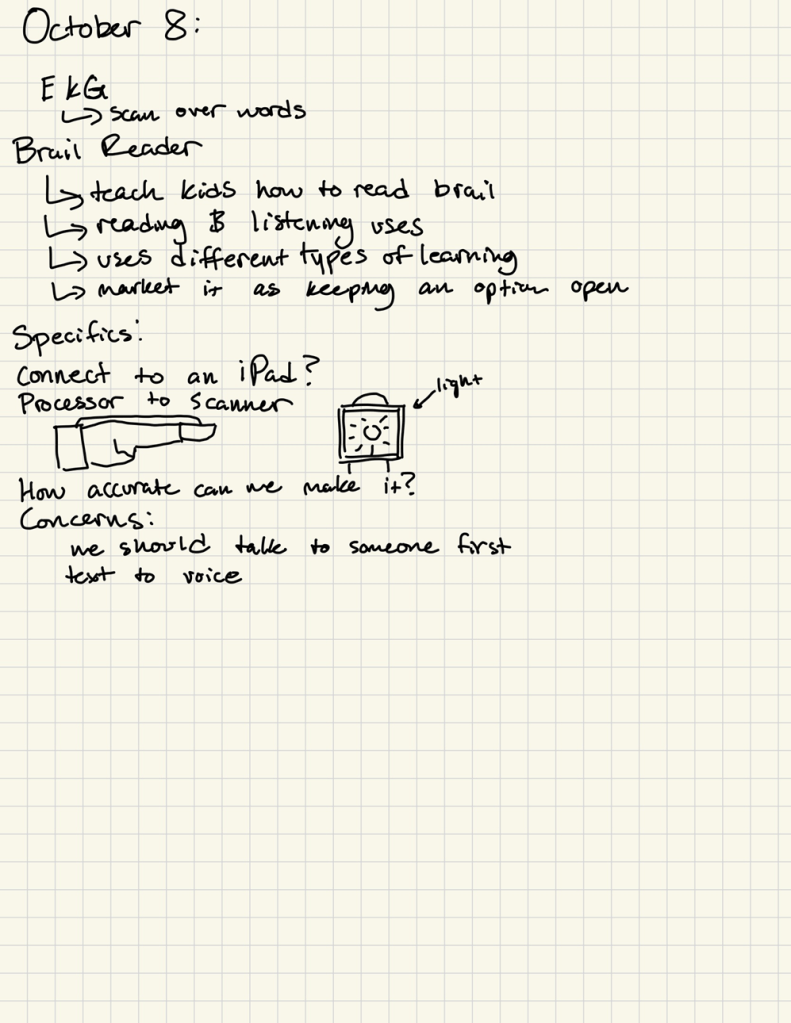
However, we reasonable had our concerns regarding the project, namely feasibility due to our time-constraints. After careful brainstorming and debating through the mechanics (e.g. how would the pistons work, what hardware we would need to use, etc.), we felt somewhat confident with our project, and excited for what it could become.
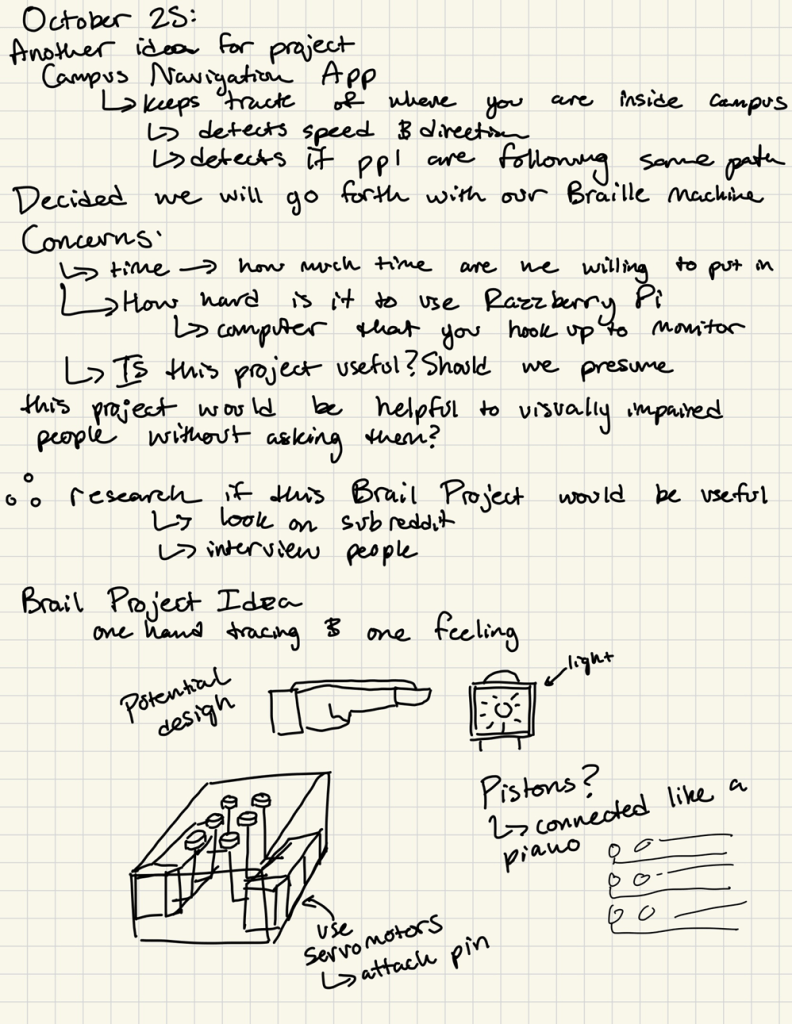
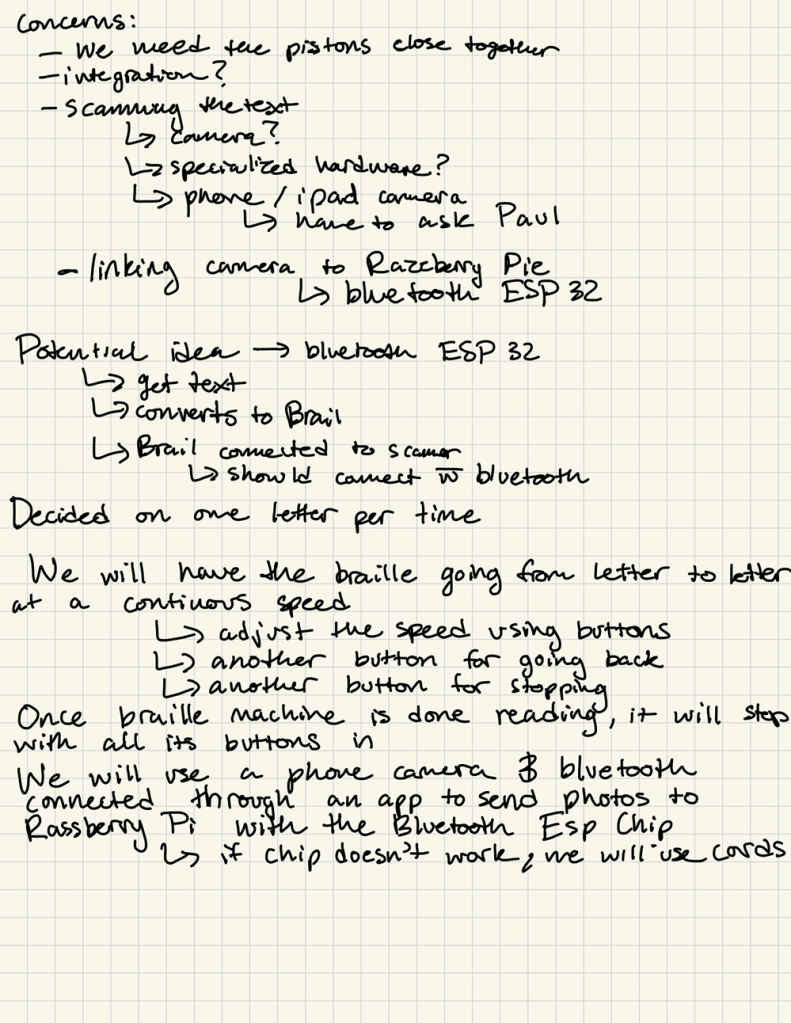
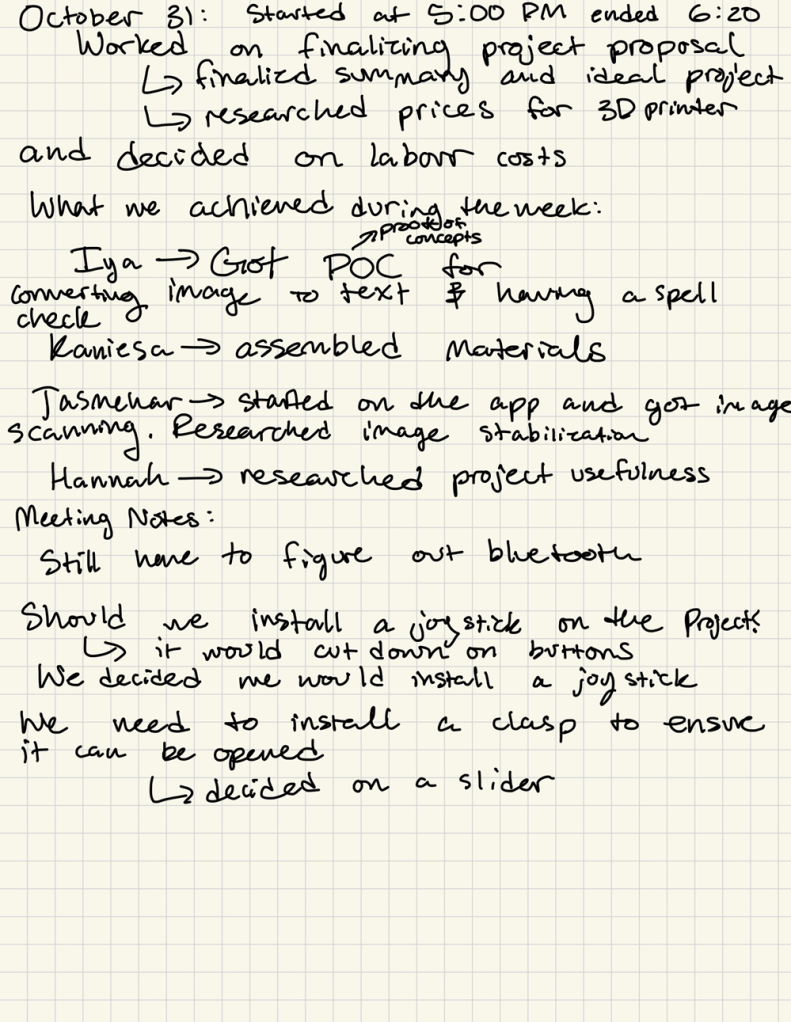
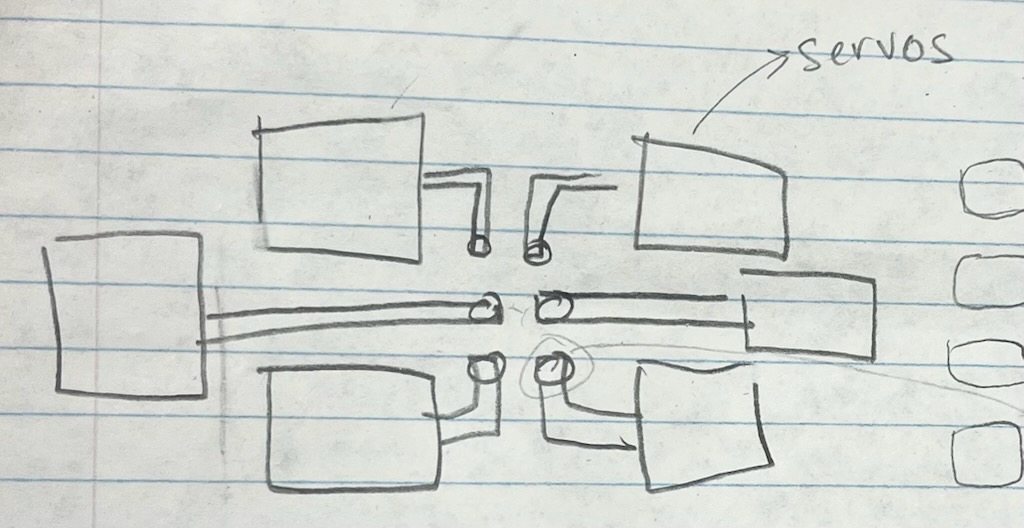
At the end of the brainstorming and planning period, we were quite pleased with our final designs for our project (see image on right) and submitted our project proposal, which got a thumbs up from the professor.
At that point, we had split up our tasks and roles between the four of us, while agreeing integration would be a group task:
- Software: programming an app to take pictures and send it to Raspberry Pi
- Software: coding the image to text to braille translation and autocorrection
- Hardware: designing and building the circuitry for the Raspberry Pi
- Construction: creating the 3D model of it, printing it and putting together
Obviously, my task was the hardware (˵ •̀ ᴗ – ˵ ) ✧

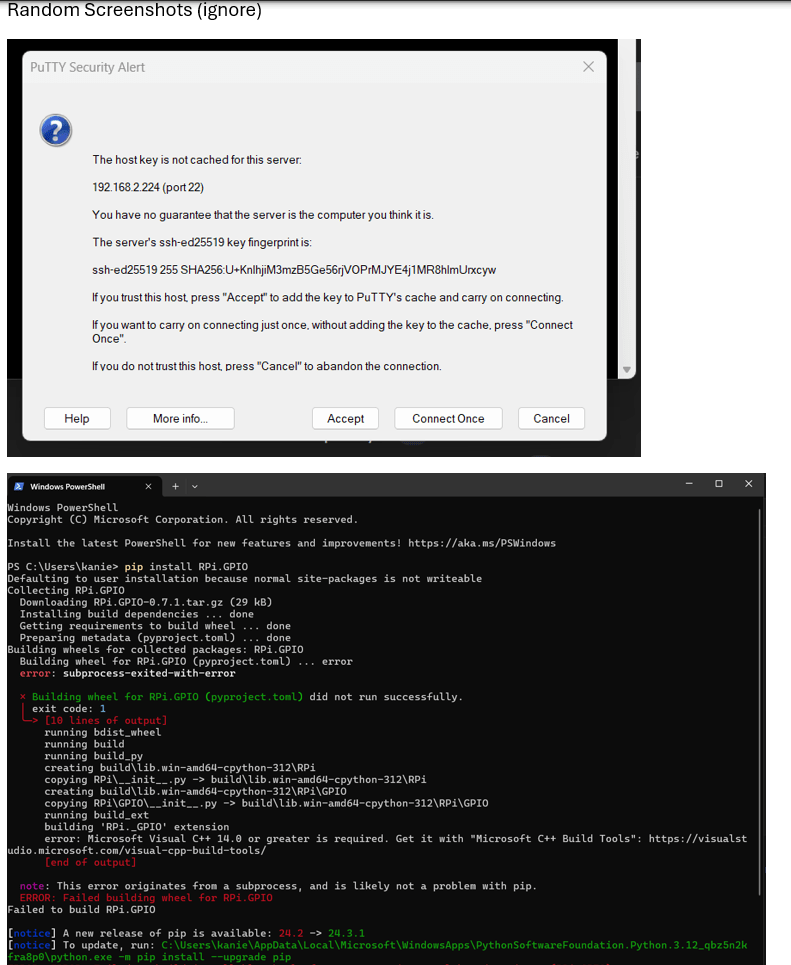
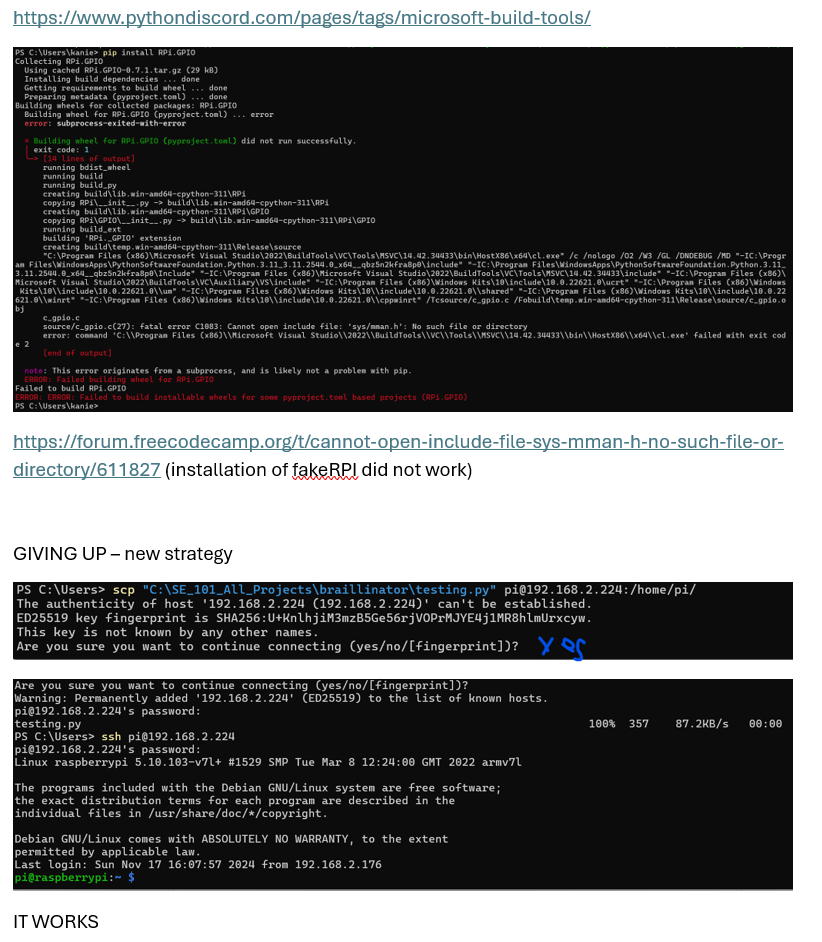
The Raspberry Pi & Cursed Hotspot
So, being the overly ambitious person that I become whenever I’m starting a project, I wanted to make our demo completely mobile, which meant being able to run the project with no monitor, keyboard, and mouse connected to the Raspberry Pi.
This did not work out.
Was it possible? Yes.
Did I sink countless hours into trying to make it happen? Yes.
Did it work? No.
See, with everyone falling slightly behind on their individual tasks due to unexpected troubleshooting, we knew we had to speed things up to meet our deadline. This meant delegating our time and breaking down our tasks into the MVP that would get us to group integration, an unknown variable in regards to how much debugging and fine-tuning would be required. And so, hunting down available monitors, keyboards, and computer mouses (mice?) on campus it was.
Screenshots of me trying to get things to work with varying levels of success:

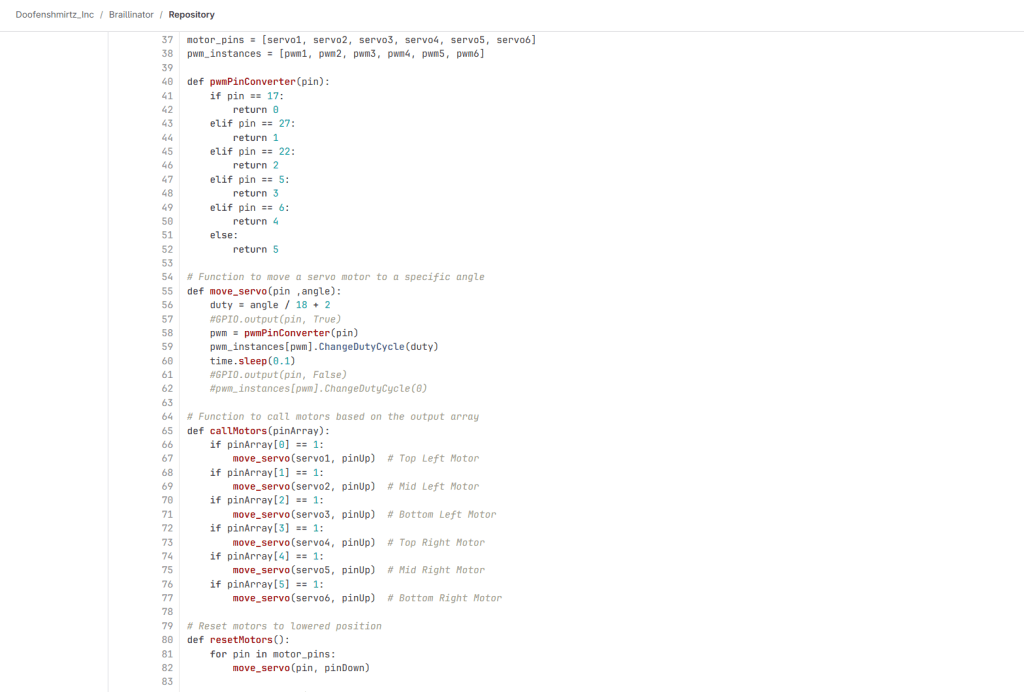
The Hardware & It’s Code
Finally, the easy part. A controversial thing to say to my classmates, people who cheer our CS courses while fervently hating on our ECE courses, I know.
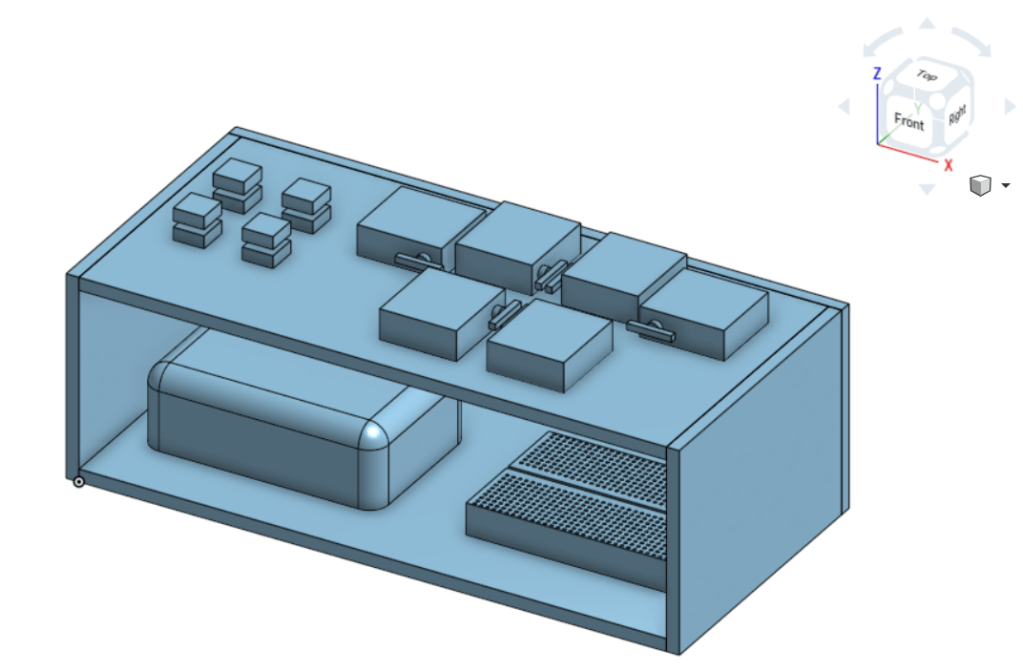
The circuit that pushes out the pistons of the Braillinator consists of six servo motors, four buttons and resistors, and lots of wires. The six servo motors were attached to the 3D printed pistons and served the purpose of pushing the pistons up and down based on commands from the Raspberry Pi. We had specifically chosen servo motors for their precise and quick movements, as we did not need a powerful motor, merely one that would move an exact number of degrees. We did have to perform troubleshooting as each individual motor needed to be calibrated to its starting position and ending position. This was because while securing the motors to the Braillinator base, the pistons got shifted. As for testing, the motors were tested before attaching the pistons and securing to the base, to ensure a smoother time during integration. A video for motor testing its code can be found below.
As for the other components, the four buttons provide the user with extra control features: to play, restart, skip forwards, skip backwards. The buttons were also tested individually before integration with the rest of the code. This was to ensure the buttons worked, had the correct resistor value attached, and the correct code for detecting if the button was pressed.

Video of Testing Servo Motors
Images of Servo Testing Code:


Fun Interludes with the Construction Task
Outside of my tasks, I worked closely with my teammate who handled the design and construction aspect of the project.
Considering we were both focusing on the physical aspects of the project, it made sense, not to mention we had lots of fun working (and sometimes goofing off) together.
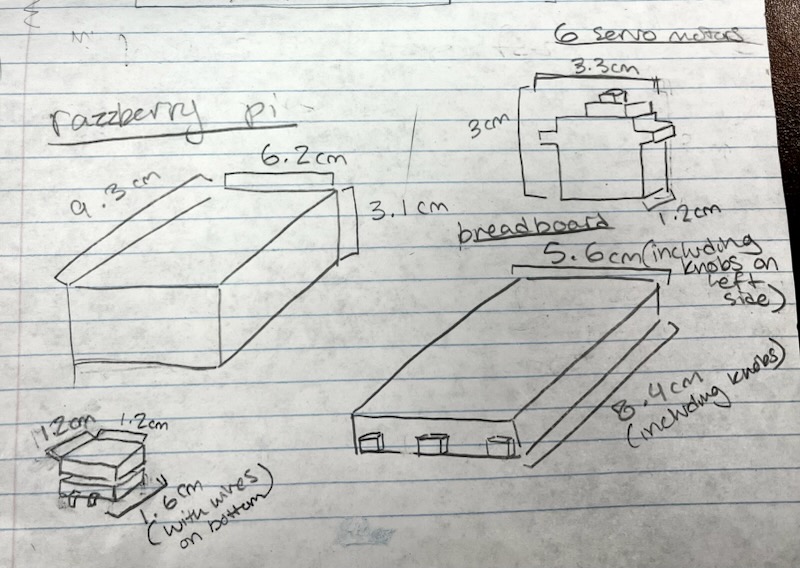
She took measurements of the hardware components so we could figure out a minimum size of the base (we wanted it as compact as possible), which we made a 3D model of. After that, she made the base model, including a sliding feature to make the Braillinator more sleek and convenient.


Troubleshooting, Troubleshooting, Troubleshooting…
Hey, did I say troubleshooting? Well, there was a lot of troubleshooting. A few things of note were…
- Integrating the hardware servo code with the software braille translation code was surprisingly tricky.
- Getting the pistons to easily push in and out of the holes was a hassle due to the 3D printer’s faulty printing.
- Attaching the pistons onto the servo motors at an angle that would work smoothly.
- Manually tweaking and coding the motors to move only a certain number of degrees to ensure the pistons push out, but don’t push out too much.
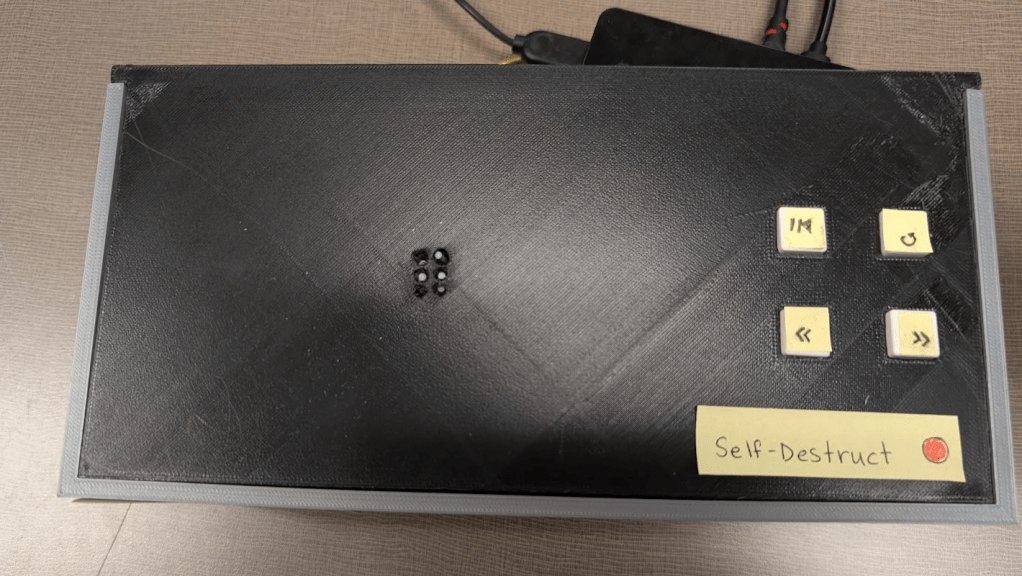
The Final Result
After a weekend (+Monday) of frantic worrying, desperate project fine-tuning, and somehow trying to squeeze in time to study, it was finally demo day. I remember waking up a few hours before our morning classes the day of to make more refinements with a fellow teammate, and an exhaustive worry throughout until the afternoon demo, only for things to…
Work out perfectly!
Genuinely, the demo went far better than expected, with curious Professors and classmates alike taking a look at our project. This provided a much-needed confidence boost, to quickly get through the recording process for our pitch video, displaying and advertising the final results on our final day of classes. Thanks to one of our teammates ability to create a cinematic masterpiece, it all turned out Braille-iantly (see what I did there?) So with that, I must say…
[insert Dr.Doofenshmirtz voice]
BEHOLD, THE BRAILLINATOR


Now, if you also want to see the cinematic masterpiece that is our Pitch Video, here it is:
(note: if you want to see just the Braillinator in action, skip to timestamp 1:30 or check out the video below!)
Closing Thoughts
Now, there wasn’t much I liked about this course (sorry Professor, but it’s the unfortunate truth), and even this project itself drove me crazy at times, but looking back, I guess it all worked out! And best of all, that’s one less project sitting in my drafts.
While there’s many more features that could’ve been added (and maybe I’ll get to them in the future), I’m eager to see what other fun projects, learning, and discoveries I’ll have during my time at university!
The best is yet to come 🙂
– K.D

Leave a comment