Want to know what I’ve been working on for the past FIVE months? Buckle up, because this is a long one. I’ve been slowly adding to this post over the months and I am so proud to officially publish my journey of building one of the biggest projects of my life so far: The Firefighter.
The Firefighter is the infamous project all Gr.12 students enrolled in the computer engineering course must create- either on their own, or with a partner. This project, one I had been waiting to do with anticipation for over year, was one that I had chosen to do as a solo project. Of course, it wasn’t a journey I had embarked all by myself, as I grew close with other classmates working on their own firefighters and made some amazing memories along the way. For now though, let’s dive right into the nitty-gritty of making my own Firefighter Bot, who I had affectionately named Freddie!
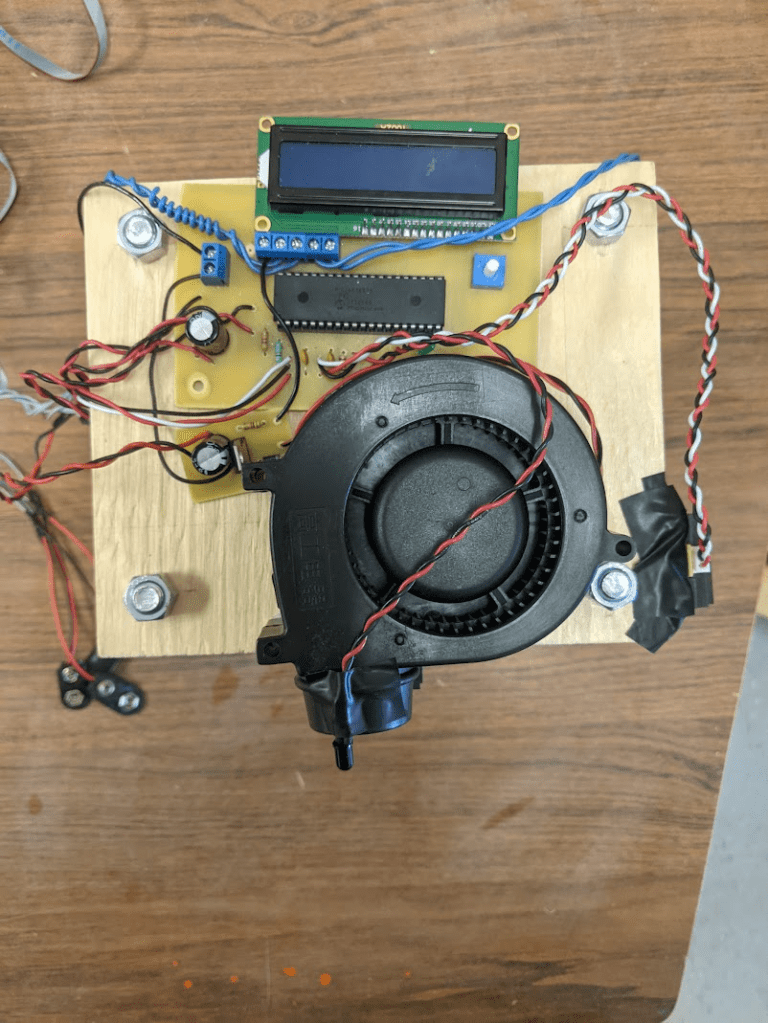
Project Schematic

The Breadboard Beginnings
Before we could begin the project, we first had to build the entire circuit on a breadboard. This was to ensure we truly understood how the circuitry behind the project works, to prevent us from making as many mistakes when doing the actual project on the PCB’s, which can cause much more headache and work if anything is done incorrectly.
To get some familiarity with using breadboards, and to enhance our general knowledge on the logic gates content we had been learning earlier, we first had to do the breadboard labs, which I do have a couple posts about, so feel free to check that out! The labs were done easily enough though, and I soon got started on the breadboarding of the actual firefighter. It had taken longer than planned to do, but wasn’t too bad overall.
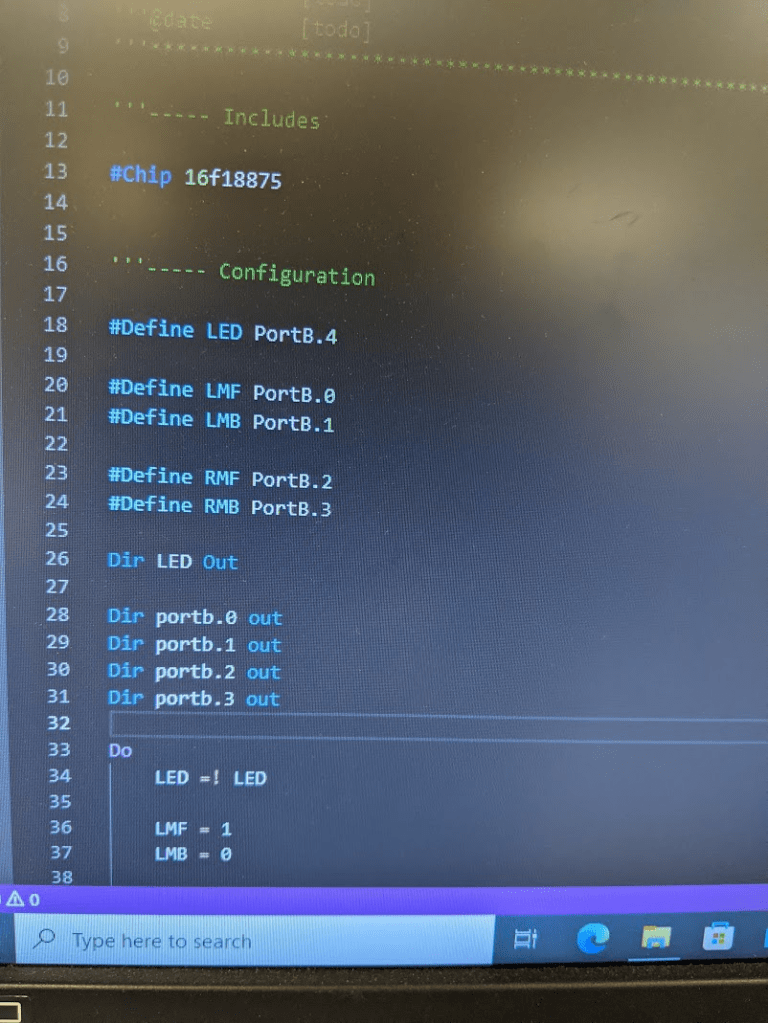
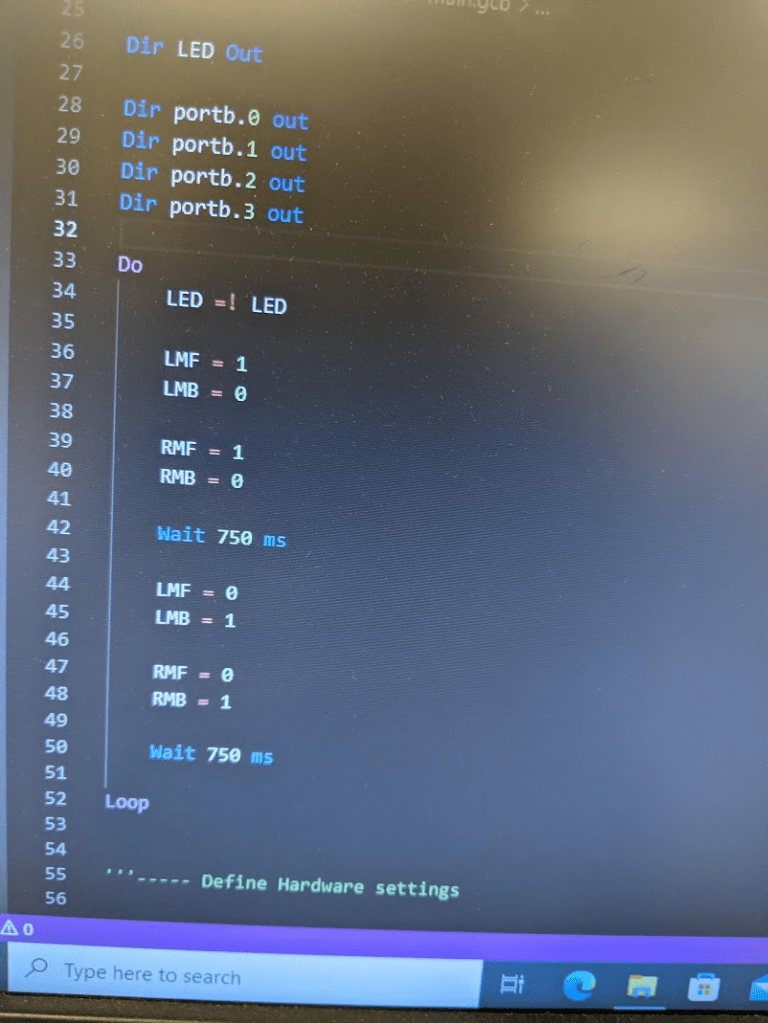
Video of testing the PIC chip with an LED:
In between the breadboarding, I did have to make my Project Proposal for the bot, detailing my how the bot would work, my strategies, a model of the bot design, as well as material costs and project timeline. Feel free to check out my Project Proposal Document by clicking the button below:
Note: the proposal also explains how different sensors work in simple terms if anyone is curious from the schematic above!
Motors
Similar to the sumo bot, one of the starting stages was preparing the motors and testing them (after testing the PIC chip, of course). After all, the motors are a driving force behind the firefighter (bad pun intended). Anyways, by preparation, I mean lightly sanding the sides of the metal on the motors so I could solder three capacitors on each one. This was followed by soldering on wires for the positive and negative connections of wire, before covering the sides of the motor in electrical tape to prevent any short circuiting and connections loosening. As for the coding, I had look at online documentation and videos to figure out Great Cow Basic, the language I was going to be using for the project.
Images of figuring out some basic code to test my motors:
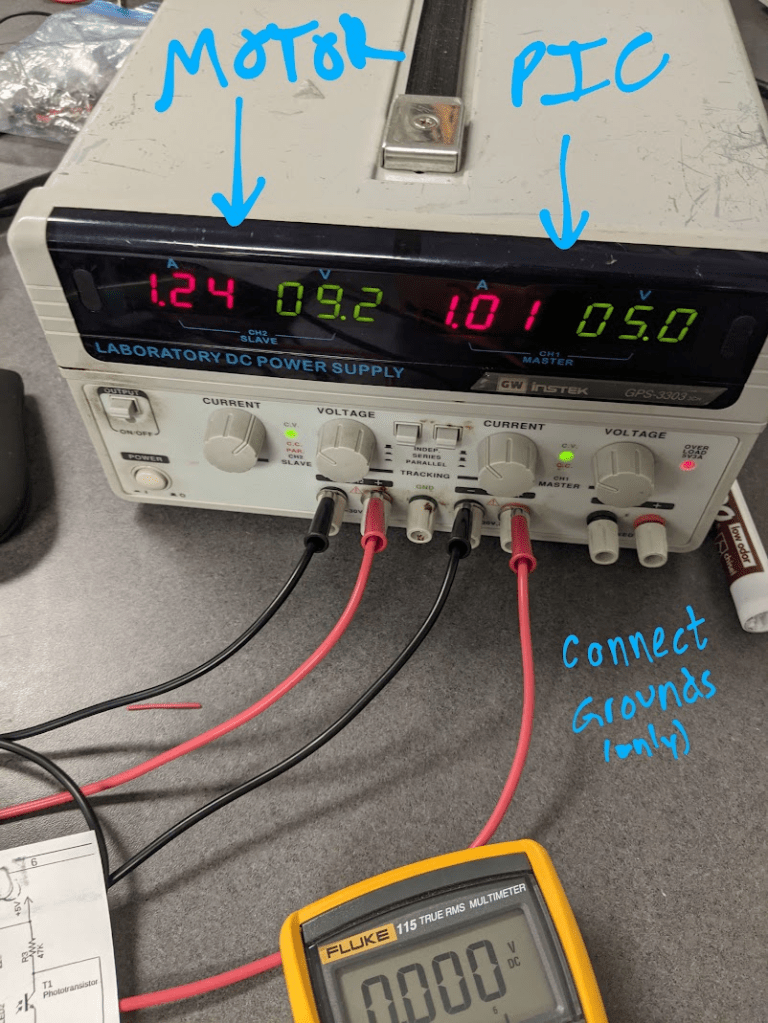
A big issue I faced along the way was that every time I connected the power supply, the motors would only work for a short period of time before displaying strange behavior. Namely, the motors would slowly get worse at reversing directions.
In the end, turns out I forgot the decoupling capacitor. Oops.
Thankfully, this was still during the breadboarding phase, and I did get it working in the end:
A Gallery of the Process…
Other parts of the process included:
- Setting up Line Detection
- Figuring out Wall Detection
- Completing both Flame Detection & Extinguishing
- Designing the Firefighter circuit boards on Traxxmaker
- Etching, Scrubbing, Center Punching, and Drilling the Circuit Boards
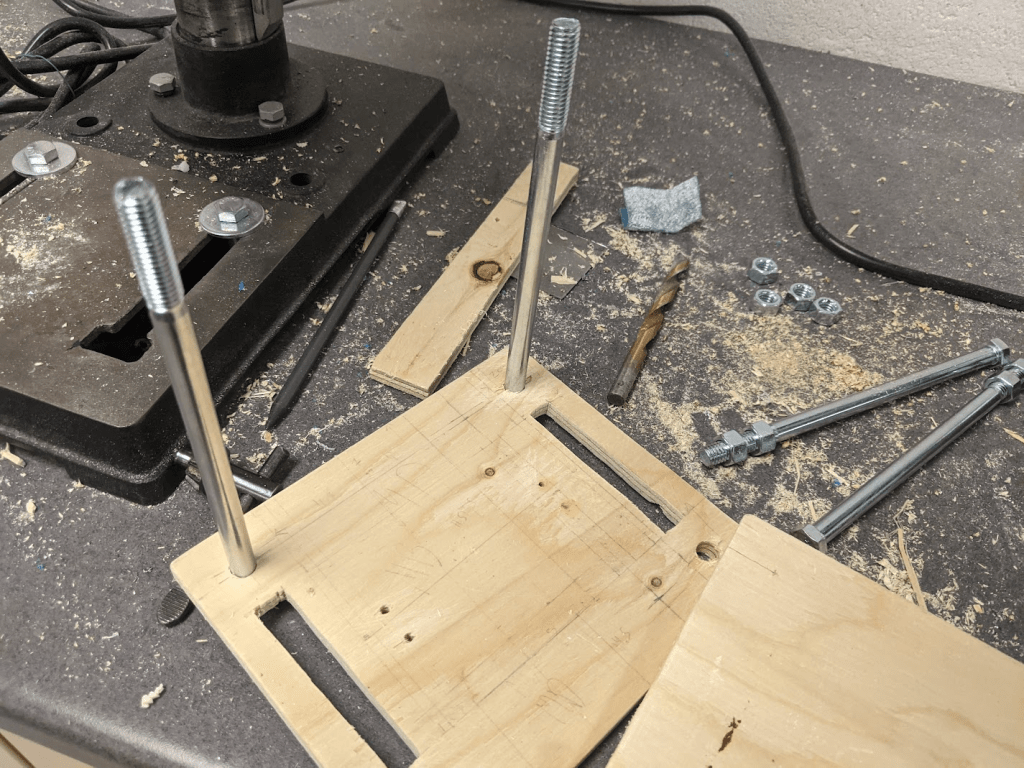
- Preparing and/or buying materials for the base of the bot (i.e. 11 inch screws)
- Preparing, Cutting, Drilling the base of bot
- Assembling the bot together
- Lots and lots of troubleshooting
- More troubleshooting
- Testing out the bot in the maze, fine tuning results for maximum success


a mid-project excerpt of my thoughts…
I spend almost an hour every-day working on the circuitry and coding for the bot, learning in-depth about various concepts, such as using infrared sensors, troubleshooting, coding in Great Cow Basic, troubleshooting, LCDs, and did I mention troubleshooting? While I feel that I’ve been spending most of the time attempting to find and fix issues, I’ve developed a great deal more patience and independent problem-solving skills. Turns out, two weeks of troubleshooting due to an unnoticed phototransistor that was soldered backwards does that to you, but the journey has been more than worth the effort so far.
Final Project

A Written Reflection
Have you ever seen a magic trick, one that left you wondering and thinking about how it worked? Whether your eyes are failing you, or whether what you saw was actually possible? The Laurel Heights’ Grade 12 Computer Engineering course is much like your wonder-inducing magic trick to me, except the wonder never fades, even after uncovering the “trick” behind it.
The amazement I felt at watching my own bot begin to move across the maze was the same, if not far more, than that of watching previous firefighter videos at the very beginning of the course. As corny as it sounds, it almost made me feel powerful, that I could build something with my own two hands, something that can move and act on my command.
Most importantly though, working on the Firefighter, the Sumo Bot, and even the projects in my junior years to an extent, all taught me so much. From soft skills like patient problem-solving and perseverance when things aren’t working out, to the actual engineering-related skills and experiences that, in my opinion, every aspiring engineer should have to confidently pursue engineering as a career.
I would genuinely implore every student considering engineering as a potential career, especially computer, electrical, or mechatronics engineering, at my high school to take this course. From soldering, to basic circuitry, and most importantly, troubleshooting, these are all concepts and experiences taught in TEJXMI courses that will be delved further into should you pursue it post-secondary, making it the perfect opportunity to test out whether this kind field is suitable for you. If you’re already confident in pursuing engineering like I was though, it gives you an amazing advantage and preparedness for the post-secondary learning to come!
However, that’s not to say that taking this course doesn’t come with its own challenges and obstacles to overcome. Sometimes, you could be stuck on the same issue for days, or perhaps stumble upon a new issue on every step of the way. I know that there were moments when I wanted to tear my own hair out of frustration, but that’s just a part of the experience, so to speak. The goal is to keep trying, and trying your best. For every mistake made, there’s something to be learned, even if those mistakes could’ve been easily avoided. I’d recommend taking the time to truly understand what you’re building, and how the circuit truly works. Almost everything you need to know about your project is on the schematic and notes itself! Ask questions if you don’t understand something, whether it be the teacher, or a classmate (which is especially useful for when the teacher is busy helping someone else and there’s a bit of a lineup).
As for troubleshooting, that’s something I personally struggled with, but also (hopefully) improved at as well! I had a tendency to get so caught up in the mistakes as well as what was and wasn’t working, that I’d confuse myself and end up spending too much time on something that could’ve been resolved much earlier. The trick is to start broad, and then narrow things down. Isolate locations on the circuit as to where the issue could be systematically, rather than continuously trying things out in no particular order.
A good goal is to always be moving forward with some sort of progress, and keep track of your schedule. In both grade 11 and grade 12, I had fallen behind schedule much to my dismay. Once you fall behind even a little bit, the gap widens much more easily from there. Think everything through, but don’t overthink things, as it’s just as much of a distraction as talking with your friends.
Lastly, for those who tend to get caught up in the smaller details or desire perfection even at the cost of constant indecision like myself, I’d gently ask to stay patient and kind with yourself. After the Sumo Bot, I remember being so, so disappointed in myself for just barely getting the bot qualified in time, for not winning the competitions, or even making it to the semi-finals, that I hadn’t even been able to take my project home, despite my partner having no desire to pursue technology or use for it. However, looking back, it was a great victory: Even with the bot falling apart the day before competition day, and struggling throughout the entire way, my partner and I did it in the end!
Now, I feel proud of myself for the achievement, although dampened by the same, deep disappointment, now directed at my firefighter project. I genuinely wish I had been able to complete more rooms, to spend more lunches and evenings working on the robot to make up for my slow work pace and lack of a partner. The same way I hope these negative feelings directed towards myself fade and turn into pride for the things I had accomplished and learned similar to the Sumo Bot, I hope that future students who take on this project also treat themselves for the great creations they’re making!
I don’t think there are any more words I can use, that haven’t already been written above, to express my gratitude towards the experiences I’ve had here in this classroom.
Looking forward to my next adventure—most likely university-edition at that!
Cheers,
– Kaniesa 🙂

Leave a comment